Getting Started with Kai
Your first steps with the Kai Instructor app
Welcome
Kai is a mobile app designed to help you do what you already do — teach — with a little more insight and a lot less friction. In about ten minutes, you can have the app installed, your first course created, and your students engaged.
This guide walks you through the essentials. You do not need any special technical skills — just your smartphone and your institutional email.
What You’ll Need
- A smartphone (iPhone or Android)
- Your institutional email address (the one your school or university issued you)
- An internet connection to download the app and sign in
That’s it. No IT department required.
Step 1: Download the Kai Instructor App
The instructor app is available for both iOS and Android.
On iPhone (iOS):
Search for “Kai Instructor” in the App Store, or ask your department contact for a TestFlight invitation link if your institution uses an early-access build.
On Android:
Search for “Kai Instructor” in Google Play, or use the installation link your institution provided if you are part of a pilot program.
If your institution is running a pilot, you may have received an email with a direct installation link. Use that link — it ensures you get the version configured for your school.
Step 2: Sign In
Open the app and tap Sign In.
Kai uses your institutional email address for authentication. Depending on your institution’s setup, you may see a familiar Microsoft or Google sign-in screen — just follow the prompts as you would for any other work app.
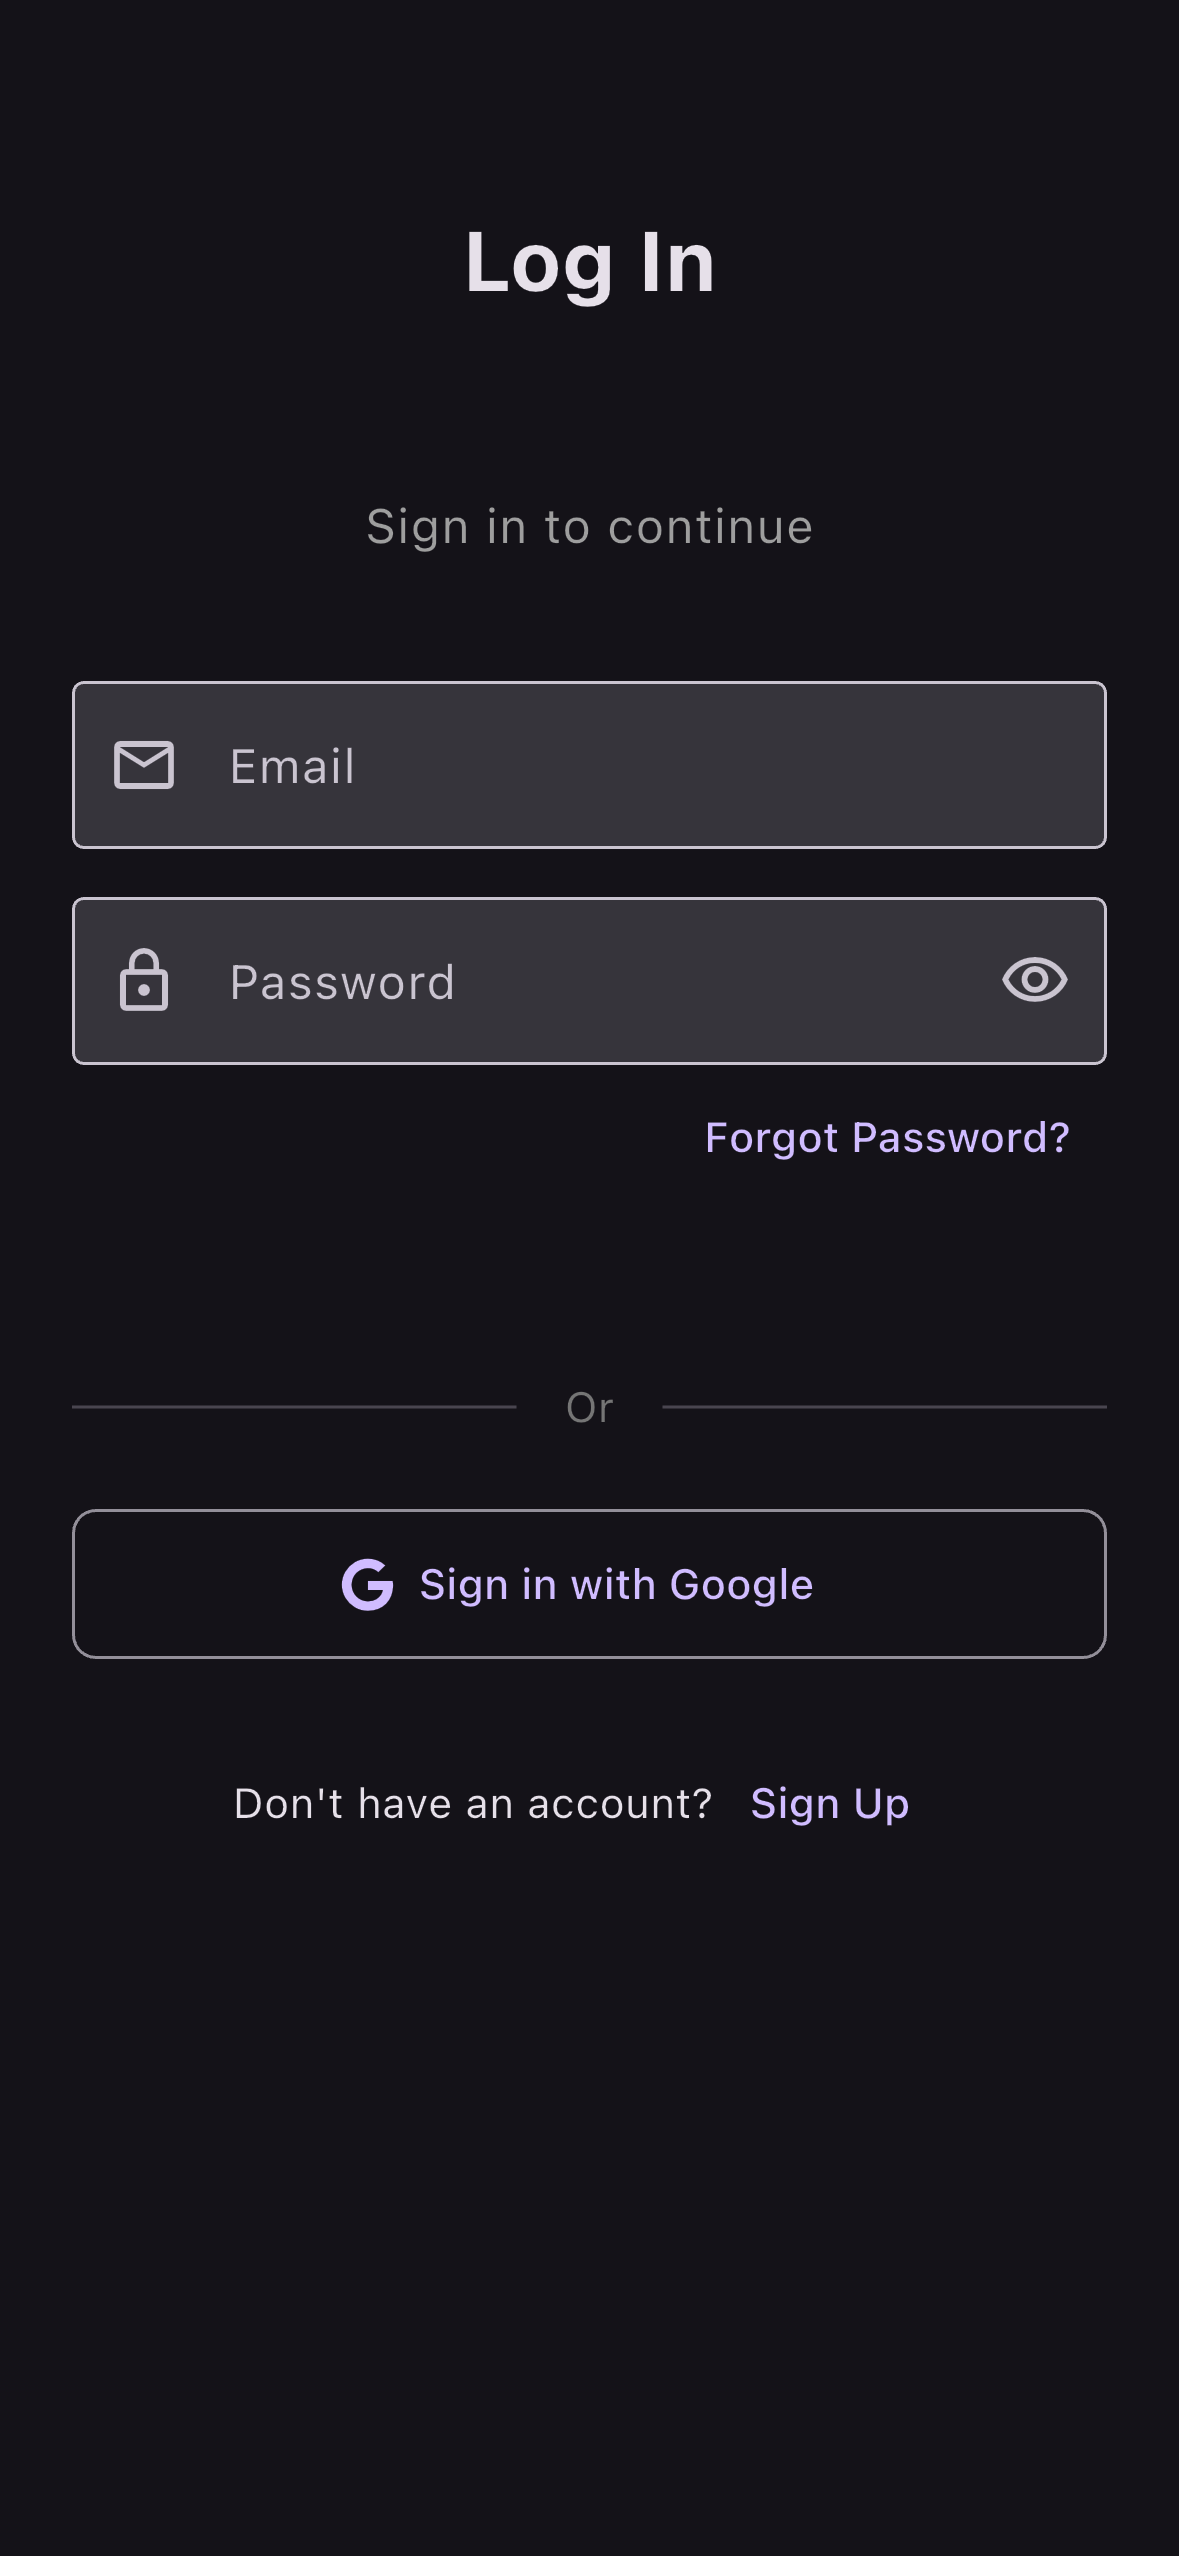
Your account is created automatically when you sign in for the first time. There is nothing to register or pre-configure.
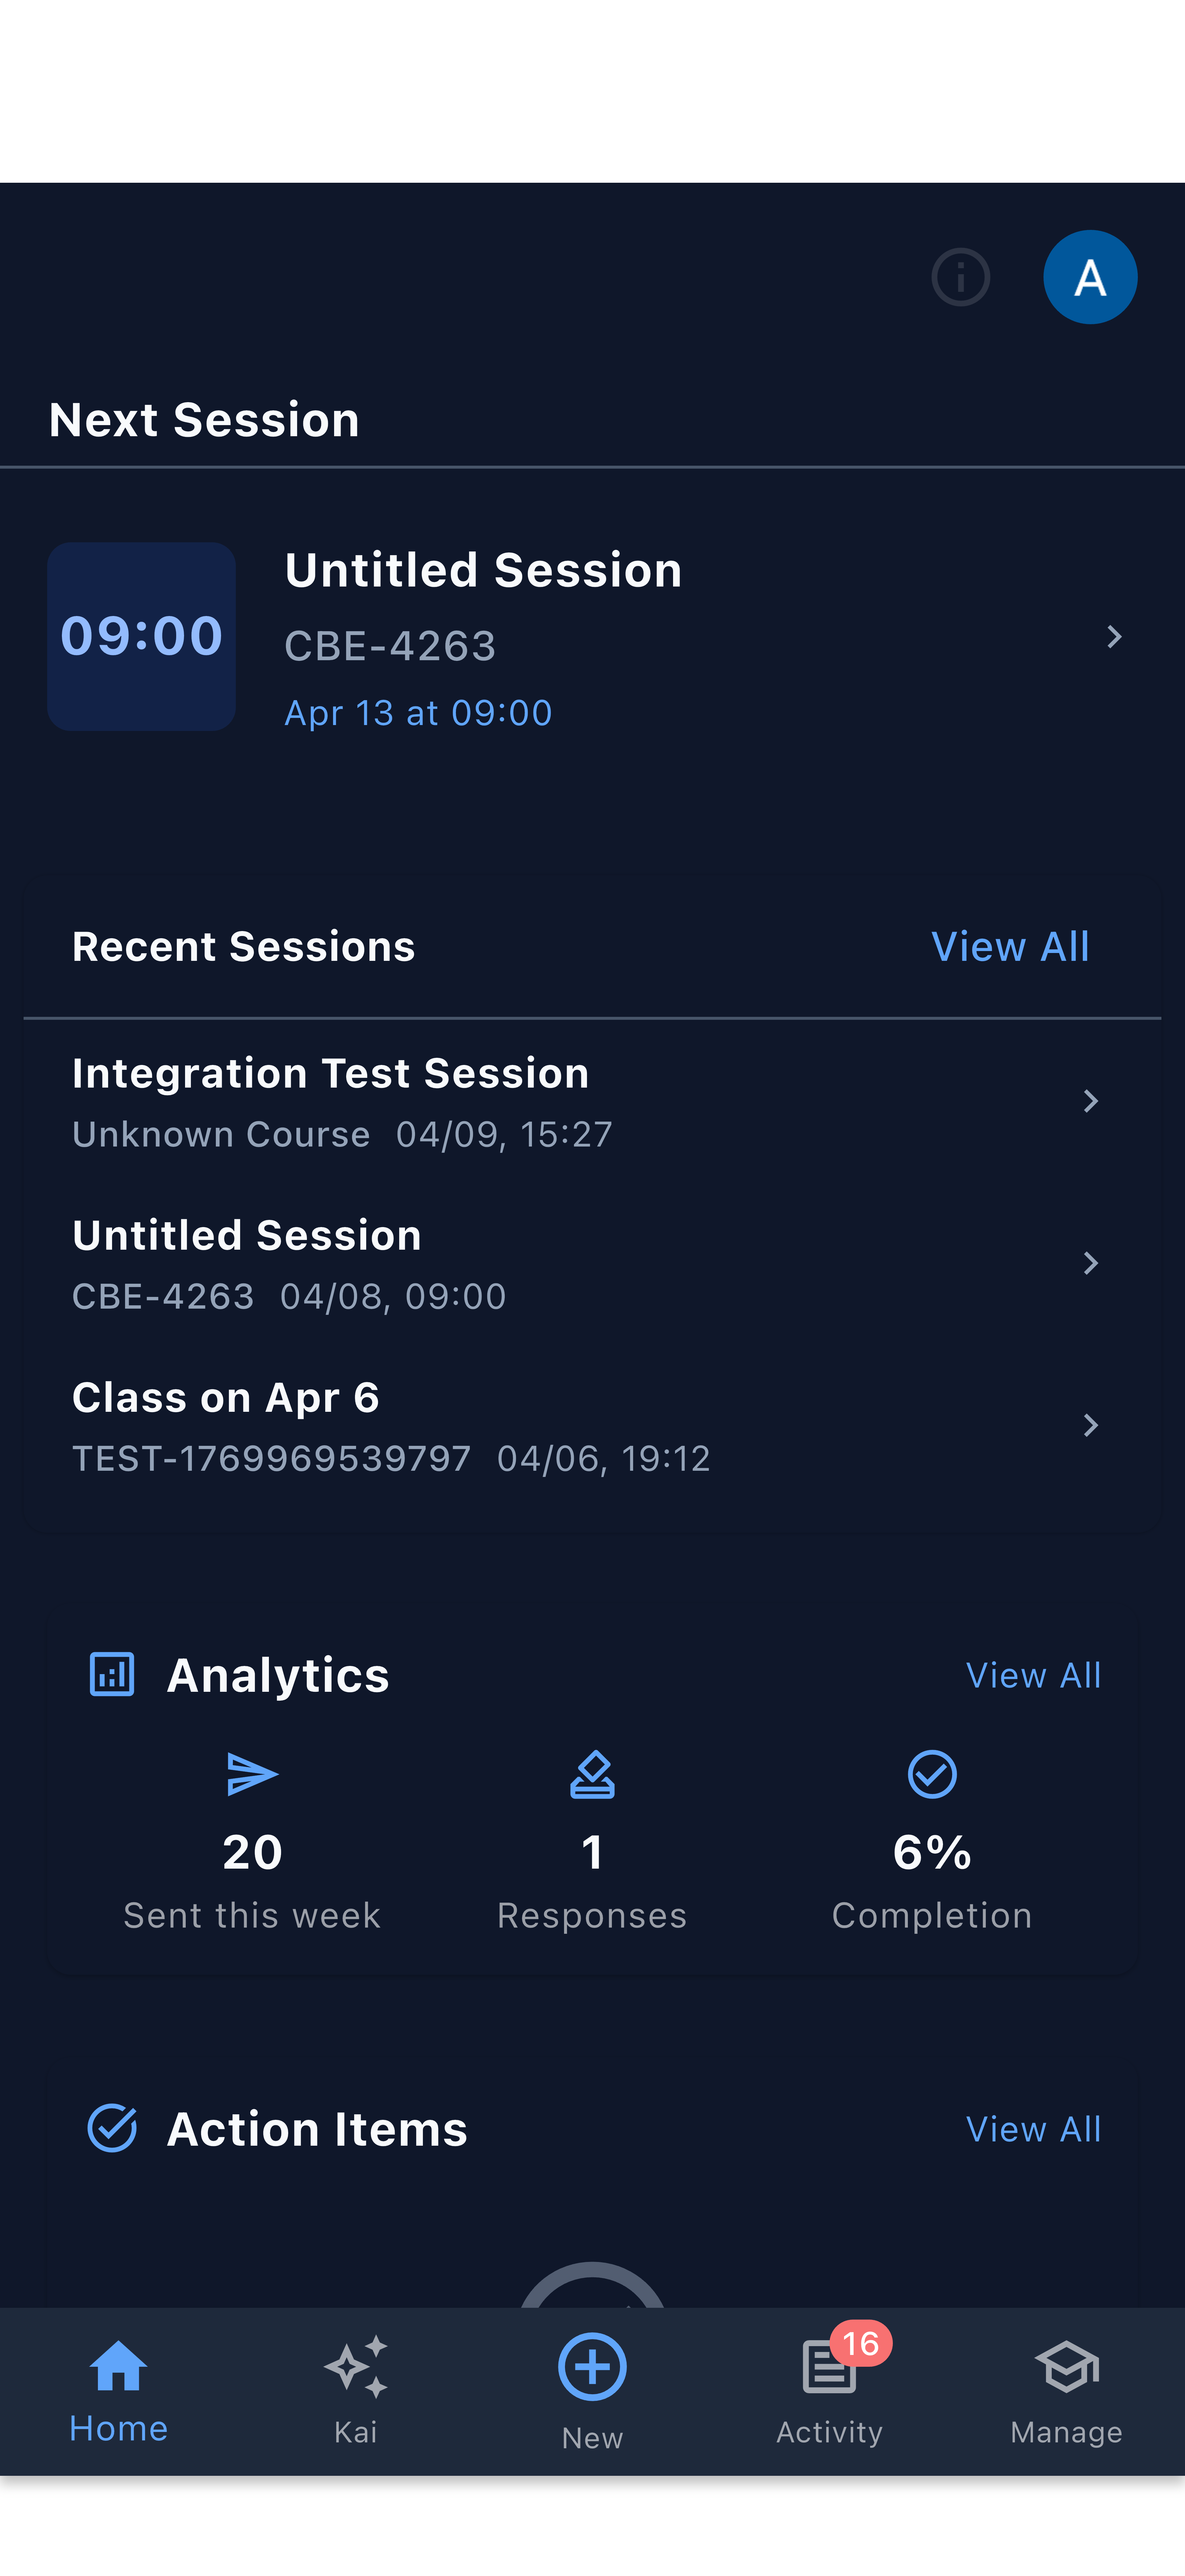
Once signed in, you will land on the Home screen. It may look sparse at first — that is expected. Everything opens up once you create your first course.
Step 3: Create Your First Course
Tap the + button at the bottom of the screen, then choose New Course.
Fill in the basics:
- Course name — for example, “Introduction to Biology” or “HIST 201”
- Term or semester (optional, but helpful later)
Tap Save. Your course is now live.
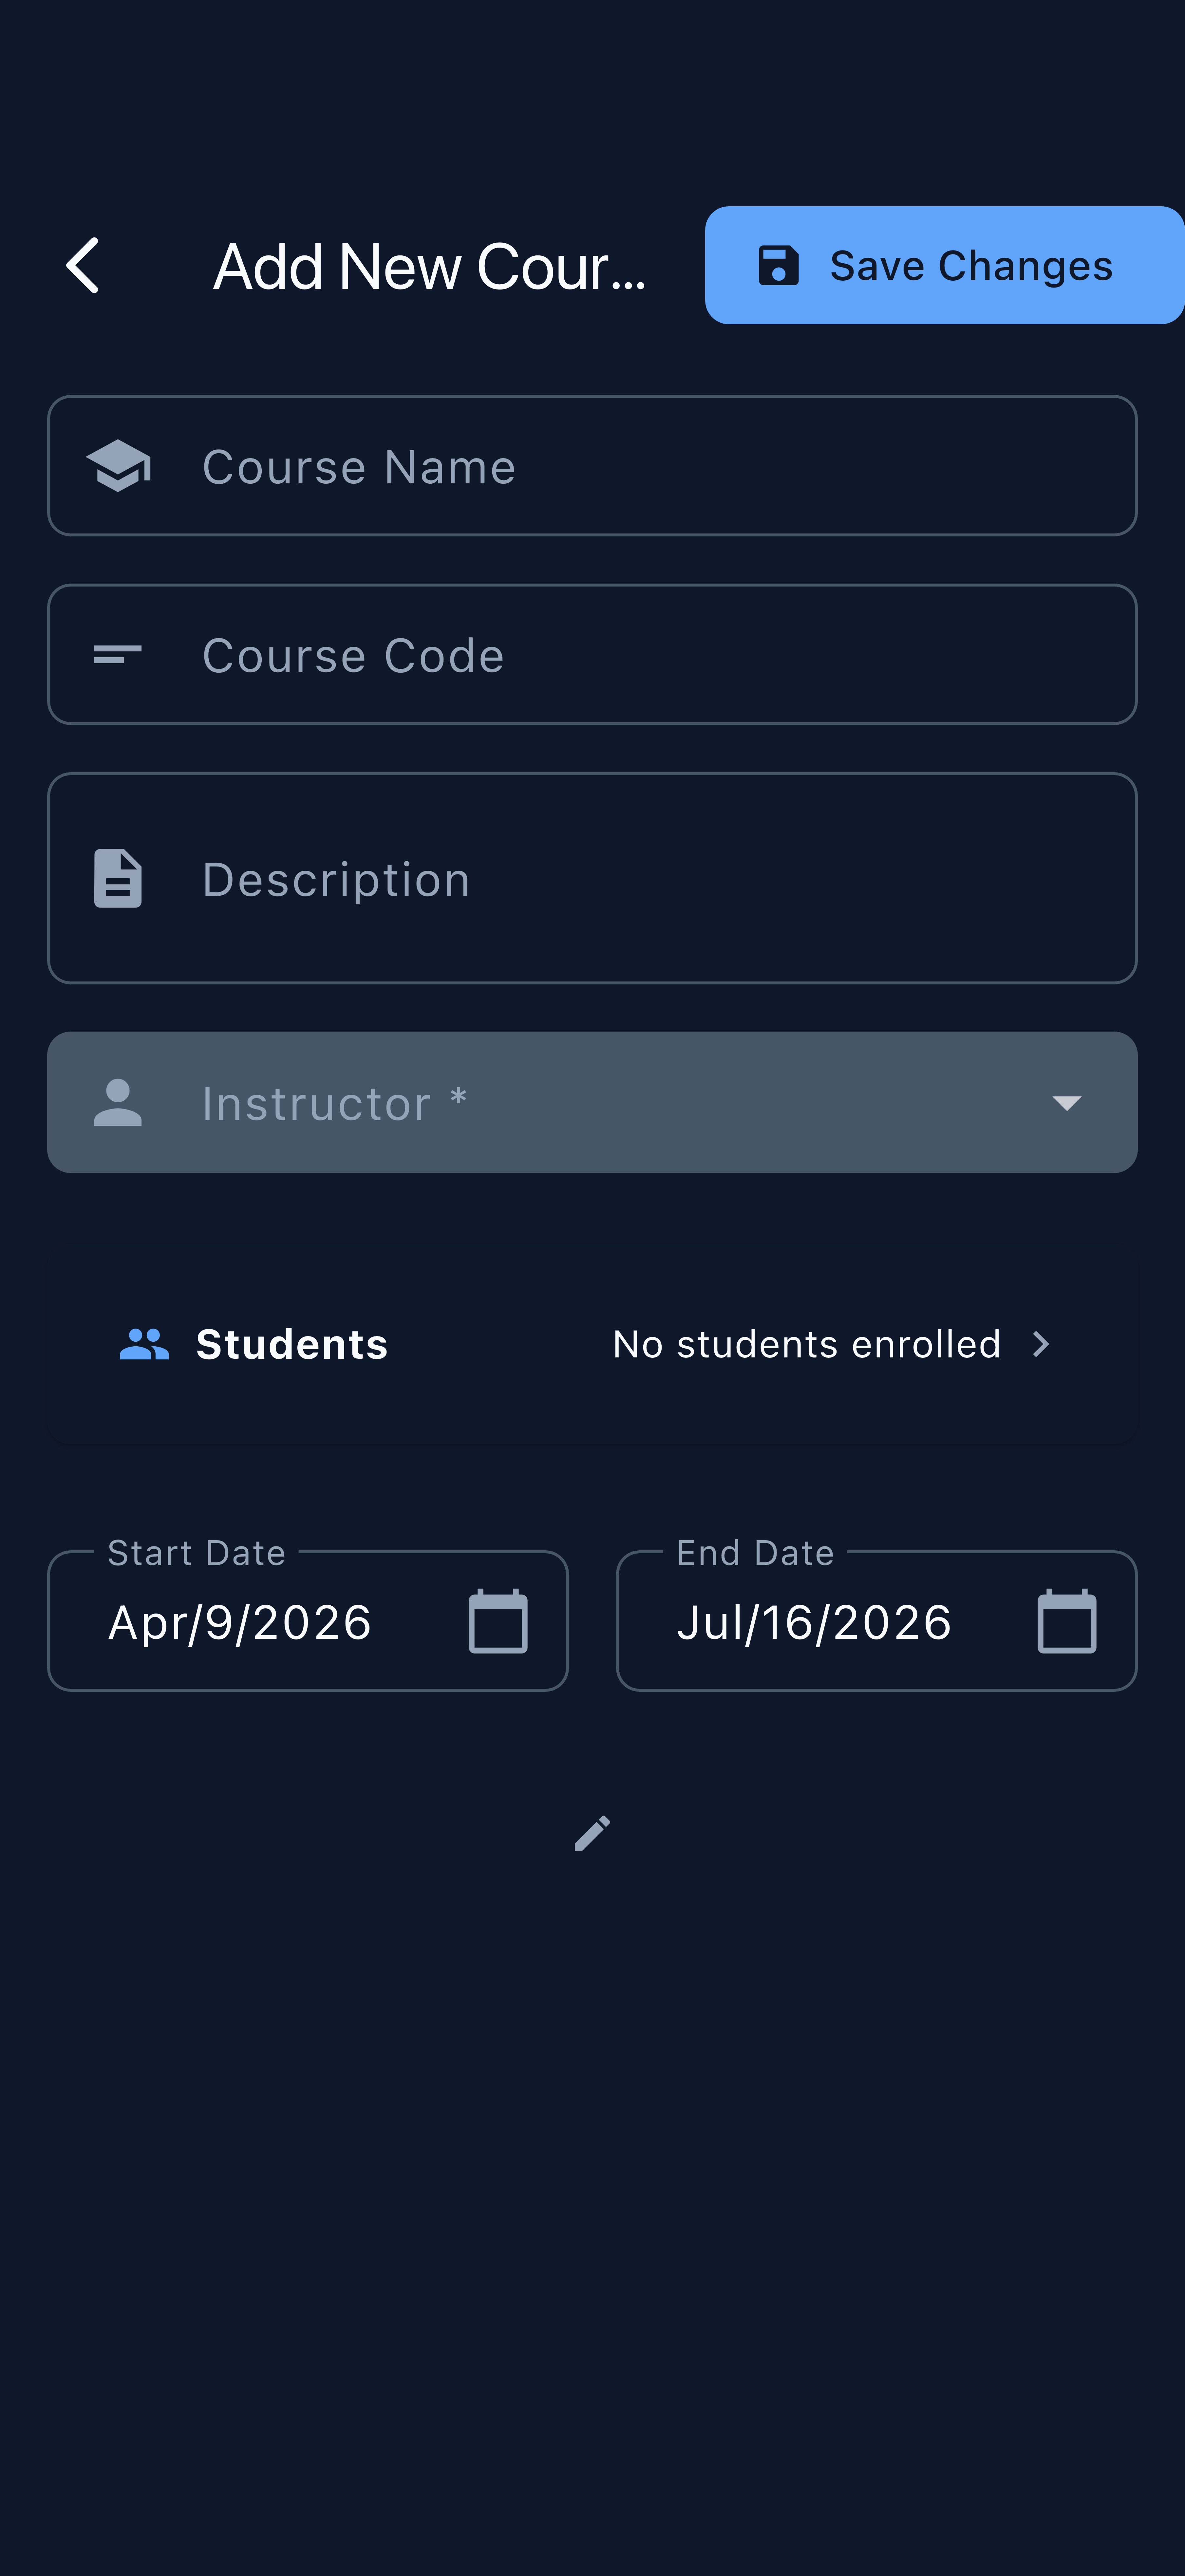
Course details can be updated at any time from the course settings. Don’t worry about getting everything perfect on the first try.
Step 4: Create a Session
A session in Kai corresponds to a single class meeting or lecture. Sessions are where most of the action happens — feedback, quizzes, and recordings are all tied to sessions.
From your course, tap New Session and give it a name (for example, “Week 1 — Introduction” or today’s date).
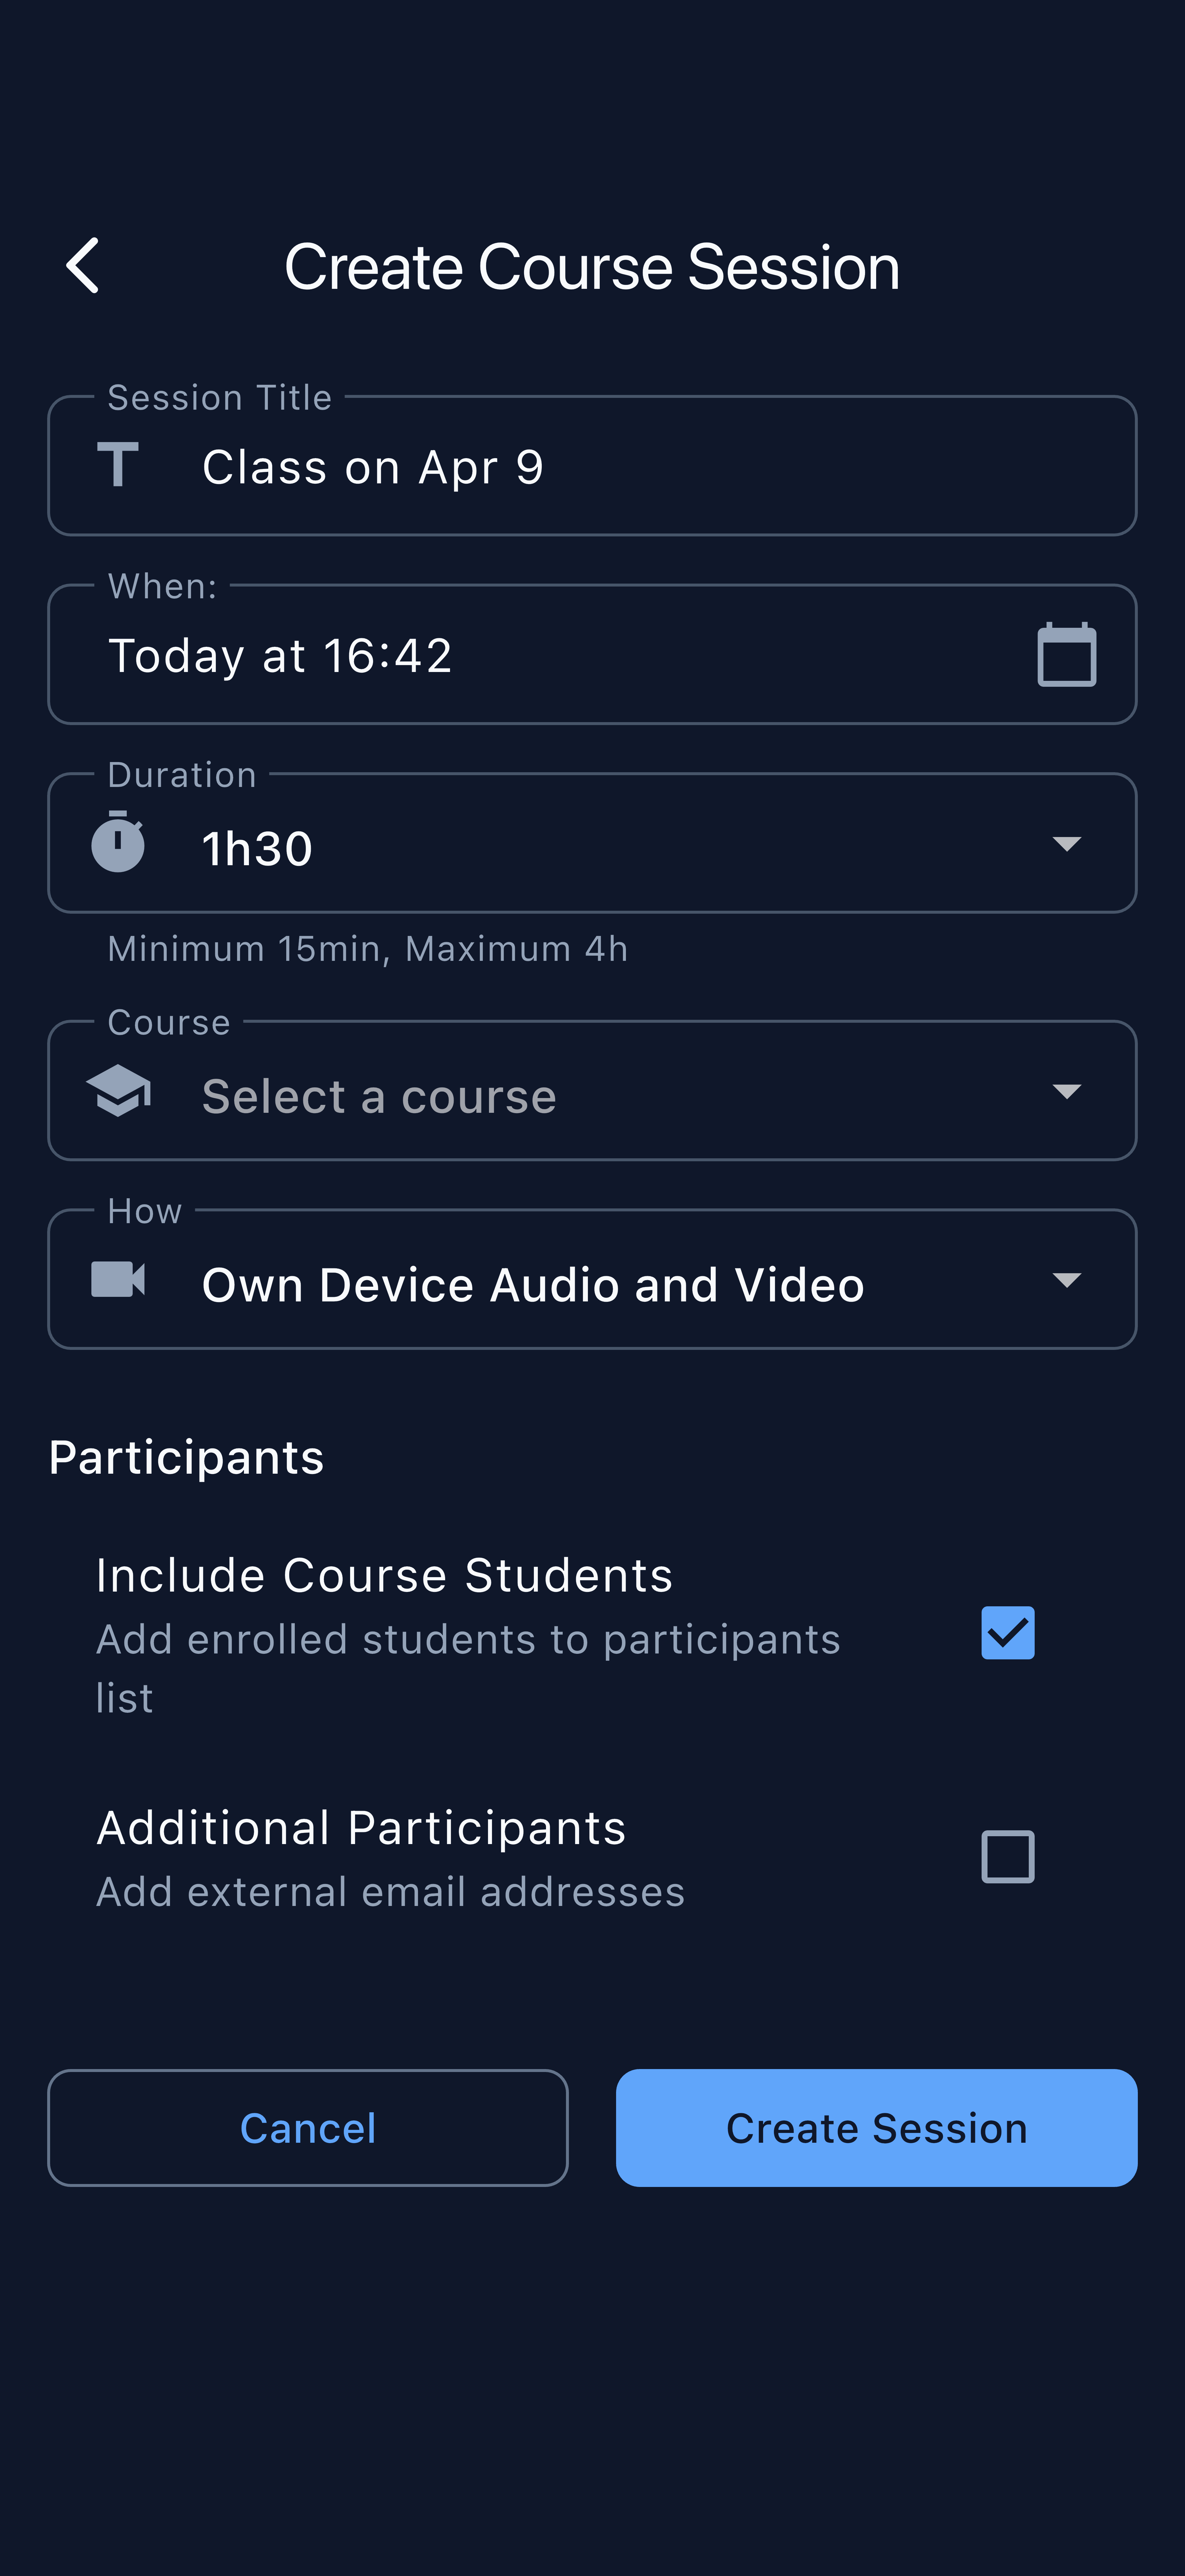
You are now ready to start using Kai’s features in class.
Step 5: Try Your First Feature — Request Feedback
The fastest way to see Kai in action is to request feedback from your students at the end of a class.
- Open the session you just created
- Tap Request Feedback
- Kai generates a short feedback form automatically
- Share the link or QR code with your students (they can open it in any browser — no app required)
- As responses come in, Kai analyzes them and surfaces themes for you
Students can respond to feedback requests, quizzes, and homework directly in their mobile browser. If they do install the Kai Student app, they get a richer experience — but it is never a requirement.
Within minutes of your class ending, you will have a summary of what your students understood, what confused them, and what they found most valuable.
What’s Next?
Once you are comfortable with the basics, explore these features:
- Feedback Workflow — A deeper look at how to use student feedback effectively, including how to read Kai’s analysis
- Pop Quiz Workflow — Generate quiz questions automatically from your lecture content
- SafeStream Recording — Securely record lectures and get AI-generated transcripts and insights
Reach out to us at support@chi2labs.com or watch short video tutorials on the Kai YouTube channel.